

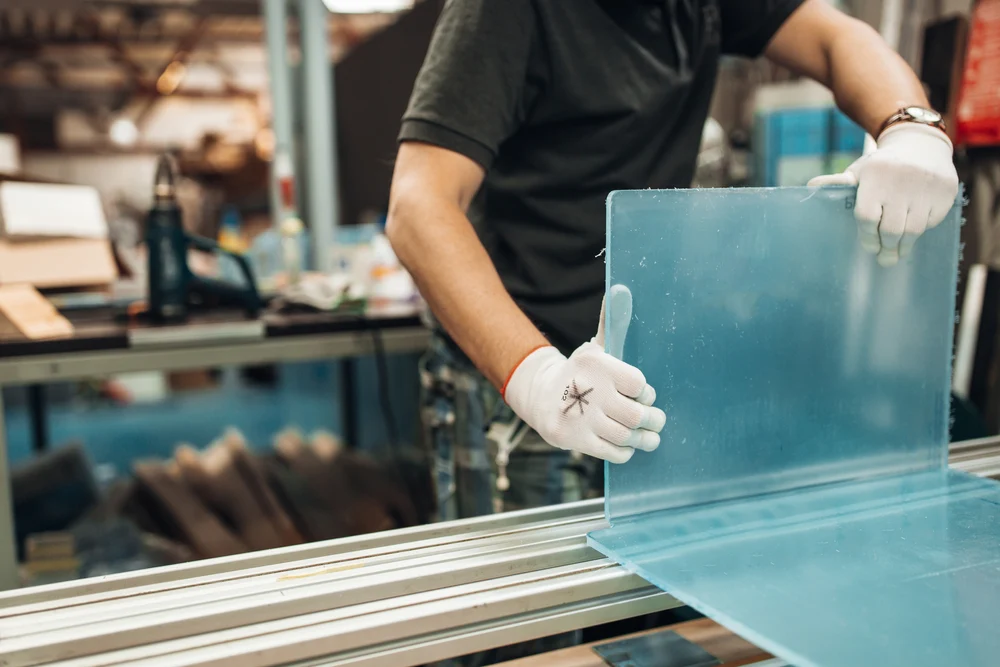
Most Perspex projects fail at the cutting stage, not the design stage. The sheet looks easy to work with until an edge chips or the line drifts a couple of mm off the mark. DIY often becomes the expensive option once you add up the tooling, wasted material and rework.
First, know what Perspex is
Perspex is a brand name for acrylic sheet made from PMMA. People often use the name as shorthand for any clear plastic, but that habit causes mix-ups when it comes time to buy material. If you order acrylic, you might get Perspex or another brand made with the same base chemistry.
It remains popular because it performs well in real builds. It weighs roughly half as much as glass at the same thickness, so large signs and display screens do not need heavy frames or extra fixings. It will not shatter into sharp shards if it takes a knock, and it holds up well under sunlight without quickly yellowing. Its low weight, shatter resistance, UV stability and easy machining explain why shops use it for signage, display cases, splashbacks and home projects.
Thickness changes what you can do with it. Thin 3mm sheet flexes a little and can be cut with hand tools. At 5mm it feels stiff and needs power tools or shop equipment to produce a clean line. At 10mm and above it behaves like a solid panel, and hand methods struggle to maintain a straight line without chipping. Every sheet arrives with protective film on both faces. Keep that film in place while you mark and clamp the material.
What DIY cutting really involves
For sheets under 3mm, the score-and-snap method still works. Leave the film on and mark the cutting line on it with a fine marker. Run a sharp scoring tool or utility knife along a steel straightedge, making five or six passes with firm pressure. Then line up the score over a table edge and press down quickly. The sheet should snap along the score.
A circular saw handles thicker DIY cuts, but the setup determines the result. You need a fine-tooth blade rated for non-ferrous plastic and a slow, steady feed. Clamp a straightedge to the sheet as a fence, then support both sides so the offcut does not drop and crack as the cut finishes. Masking tape over the cut line and on top of the protective film reduces surface scratches. Do not force the saw. Let the blade do the work, and pause if you smell hot plastic.
Expect to spend more time setting up than cutting. Measure twice, clamp the fence, check that everything is square and test the setup on a piece of scrap. That test cut shows whether the blade is melting or grabbing the acrylic. Skip the check and your first full sheet becomes the test piece.
A jigsaw can follow curves that a circular saw cannot. Use a fine metal-cutting blade and lock the sheet down tightly so it cannot buzz against the bench. Even with a careful setup, expect a rough edge that will need sanding. Wear a dust mask and eye protection, and work in a space with good airflow. Acrylic dust gets everywhere, while heated plastic produces fumes you do not want to breathe.
Cheap tools cost more when you have to buy the sheet twice.
Where DIY cuts go wrong
Edge chipping is the fault we hear about most. The blade vibrates, the sheet lifts slightly and small flakes break away along the line. You may not see the damage until you peel back the protective film. Once those chips are there, no amount of wiping will hide them on a clear edge.
Heat is the second problem. Friction softens the plastic ahead of the blade, and melted swarf welds itself back onto the freshly cut edge. The result looks cloudy and feels ridged to the touch. You can sand it back, but that adds half an hour you did not plan for. We keep the feed speed slow for this reason, while avoiding the point where the blade moves so slowly that it melts the line. Push too hard and the sheet can crack instead.
Peeling the film early causes problems of its own. Bare acrylic scratches when you slide it across a bench or turn it over to mark the other side. Draw your lines on the film with a fine tip and leave the covering in place until the part is fixed in position. We have seen perfect cuts ruined after a week of sliding around unprotected in a work van.
Stress cracks appear when a cut is forced or the sheet is not sitting flat on the bench. A firm grip near the line helps, but many home benches flex just enough to put the plastic under load. Freehand lines also wander. A 1200mm cut that starts true can drift 1mm or 2mm by the far end, and corners rounded with a jigsaw rarely meet at a sharp point. Rough edges need work with 220-grit and then 400-grit paper before they look suitable for a shelf or screen.
When professional fabrication makes sense
Shops do not cut acrylic in the same way as most people do at home. A laser vaporises the line rather than sawing through it, so the edge comes out smooth and almost polished, with far less chipping. This method suits detailed shapes, small holes, text cut-outs and logos that would be painfully slow with a jigsaw. CNC routing takes over where lasers run out of capacity. It cuts through 10mm sheet and thicker, holds large panels flat with vacuum beds and repeats the same part fifty times without drift.
The difference is clearest in the finish. After cutting, a shop can flame-polish the edge and restore its glass-clear appearance. The flame touches the surface just long enough to melt the micro-scratches flat. DIY sanding cannot match that level of clarity, while hand buffing often leaves a hazy line that stands out under shop lights.
There is a practical supply benefit as well. Ordering perspex cut to size means you do not have to buy a full 2400x1200mm sheet for a single cabinet door or counter display. It also removes the risk of ruining good material with one bad pass. The shop nests your parts to reduce waste and sends out pieces that are ready to fit. For small firms without room to store offcuts, that can settle the choice by itself.
Professional fabrication makes sense when the finished part will be seen and handled. Retail displays, splashbacks, machine guards and photo frames all have edges that contribute to the overall look. A shop is also the better choice when you need four or six panels to match to the mm, or when there is no spare day available to re-cut a failed sheet. Thick material over 10mm belongs in this category too. It wears through DIY blades and exposes every wobble.
What the cost and accuracy gap looks like
A DIY cut appears free until you price the full job. A good non-ferrous blade alone can cost more than forty dollars, before you account for clamps, a straightedge, masking tape, two grades of sandpaper and a spare sheet for practice. Most first cuts are not keepers. Feed pressure is usually learned through mistakes, and acrylic charges full sheet price for every one.
A cut-to-size fee spreads those costs across hundreds of jobs. The shop already owns the laser and extraction equipment, and it buys sheet by the pallet. You pay for machine time and the material you actually use. Offcuts remain at the shop rather than piling up in your garage. For one shelf or two sign faces, the numbers rarely favour DIY.
Time can tip the balance for small firms. Sanding a cloudy edge flat may take an entire evening, and one poor cut means another trip to buy sheet followed by another setup. A shop-cut piece arrives square and ready to install. You can screw it into position and move on to the next job.
Accuracy settles the question for fitted work. Hand-guided saws can drift 1mm to 3mm over a long run, and corners cut by hand need filing before they will sit square. Laser and CNC equipment hold ±0.1mm to ±0.5mm across the same distance, allowing a panel to drop into its frame without a fight. That half-mm can be the difference between a display that sits flush and one that rocks on a high corner. Tight fits do not forgive loose cuts.
When DIY is still the right call
DIY still has its place. If you need one straight cover for a shed window or a quick template to check the size, pick up the scoring tool and get it done. Thin sheet under 3mm snaps cleanly with little fuss, and a throwaway prototype does not need a polished edge. You save days of lead time while learning how the material behaves.
Hobby builds fit here as well. Model makers, school projects, garden beds and cloches can tolerate an edge that will be hidden in a frame or sanded smooth later. You may already own the clamps and saw, with enough scrap available for a test cut. Paying a setup fee makes little sense for a part you expect to remake next week.
Prototypes are among the best DIY uses. Cut a rough version, test the fit, take a photo and send the exact dimensions to the shop for the finished part. This two-step process keeps design fees down and avoids three rounds of machine time while you work out what fits.
The rule is straightforward. If the cut is short, straight, thin and hidden, do it yourself. If any one of those conditions does not apply, think twice.
A one-minute checklist to decide
Run through these five checks before buying sheet or booking a job. They take less than a minute and prevent most poor calls.
- Under 3mm, you can score the sheet. At 5mm, think carefully. Over 10mm, hand tools lose.
- Geometry: Straight lines are DIY-friendly. Tight curves, holes, lettering and slots belong on a laser or router.
- Hidden edges forgive sanding, but clear display edges need flame polishing.
- Quantity: One panel may suit DIY. Four matching panels need machine repeatability.
- If you have no suitable blade or clamps, the shop is cheaper than buying a full kit.
If two or more lines point towards the shop, get a quote first. The fee is often lower than the cost of the equipment and spare sheet you would otherwise burn through.
Start with the edge you need rather than the tool you own. If the job requires thick sheet, clean faces, matching parts and tight deadlines, let a shop cut it. Keep DIY for thin, quick, hidden and low-risk work where a little wobble will not show.
Comments are closed.